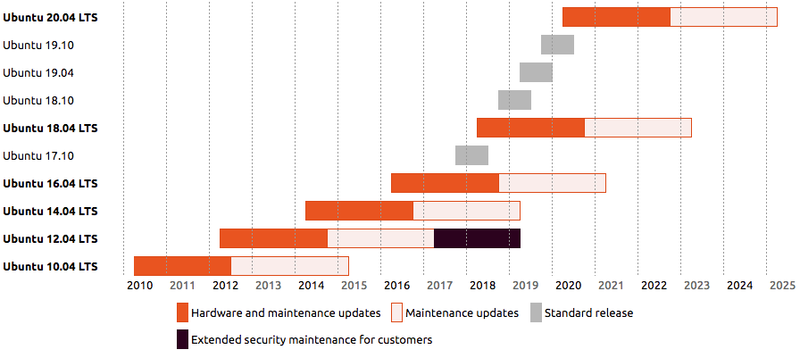
Ubuntu is the only Linux distribution I am using right now. I prefer to use LTS version. LTS means long-term support version. It is released every two years. The last version is Ubuntu 22.04LTS. The next one is Ubuntu 24.04LTS. It will be released on April 25, 2024. So now it is the Beta version.
See the life cycle of Ubuntu releases.
I downloaded the Ubuntu 24.04 LTS Beta build from the official website.
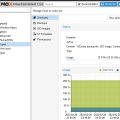
Then in my Proxmox VE installation, I uploaded the ISO file to the location of ISO images.
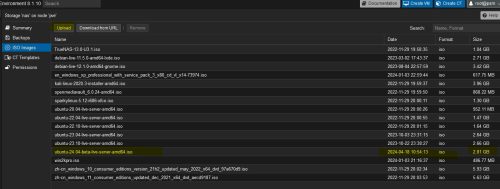 Create a new VM, with this ISO file, ubuntu-24.04-beta-live-server-amd64.iso, 2.81G.
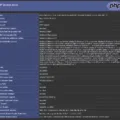
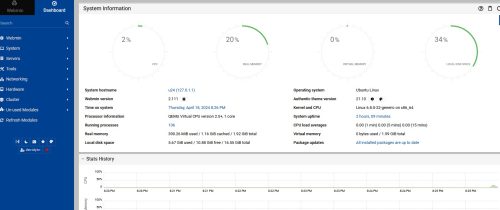
The first thing I installed on the VM is Webmin Panel.
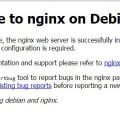
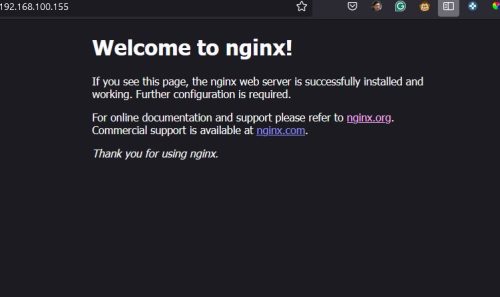
Install the Nginx with the default.
sudo apt install nginxdavidyin@u24:~$ nginx -Vnginx version: nginx/1.24.0 (Ubuntu)built with OpenSSL 3.0.10 1 Aug 2023 (running with OpenSSL 3.0.13 30 Jan 2024)TLS SNI support enabledconfigure arguments: --with-cc-opt='-g -O2 -fno-omit-frame-pointer -mno-omit-leaf-frame-pointer -ffile-prefix-map=/build/nginx-uqDps2/nginx-1.24.0=. -flto=auto -ffat-lto-objects -fstack-protector-strong -fstack-clash-protection -Wformat -Werror=format-security -fcf-protection -fdebug-prefix-map=/build/nginx-uqDps2/nginx-1.24.0=/usr/src/nginx-1.24.0-2ubuntu7 -fPIC -Wdate-time -D_FORTIFY_SOURCE=3' --with-ld-opt='-Wl,-Bsymbolic-functions -flto=auto -ffat-lto-objects -Wl,-z,relro -Wl,-z,now -fPIC' --prefix=/usr/share/nginx --conf-path=/etc/nginx/nginx.conf --http-log-path=/var/log/nginx/access.log --error-log-path=stderr --lock-path=/var/lock/nginx.lock --pid-path=/run/nginx.pid --modules-path=/usr/lib/nginx/modules --http-client-body-temp-path=/var/lib/nginx/body --http-fastcgi-temp-path=/var/lib/nginx/fastcgi --http-proxy-temp-path=/var/lib/nginx/proxy --http-scgi-temp-path=/var/lib/nginx/scgi --http-uwsgi-temp-path=/var/lib/nginx/uwsgi --with-compat --with-debug --with-pcre-jit --with-http_ssl_module --with-http_stub_status_module --with-http_realip_module --with-http_auth_request_module --with-http_v2_module --with-http_dav_module --with-http_slice_module --with-threads --with-http_addition_module --with-http_flv_module --with-http_gunzip_module --with-http_gzip_static_module --with-http_mp4_module --with-http_random_index_module --with-http_secure_link_module --with-http_sub_module --with-mail_ssl_module --with-stream_ssl_module --with-stream_ssl_preread_module --with-stream_realip_module --with-http_geoip_module=dynamic --with-http_image_filter_module=dynamic --with-http_perl_module=dynamic --with-http_xslt_module=dynamic --with-mail=dynamic --with-stream=dynamic --with-stream_geoip_module=dynamic |
Install the MariaDB server
sudo apt install mariadb-serverAdd the password to the root user of MariaDB
sudo mysql_secure_installation |
davidyin@u24:~$ sudo mysql_secure_installationNOTE: RUNNING ALL PARTS OF THIS SCRIPT IS RECOMMENDED FOR ALL MariaDB SERVERS IN PRODUCTION USE! PLEASE READ EACH STEP CAREFULLY!In order to log into MariaDB to secure it, we'll need the currentpassword for the root user. If you've just installed MariaDB, andhaven't set the root password yet, you should just press enter here.Enter current password for root (enter for none):OK, successfully used password, moving on...Setting the root password or using the unix_socket ensures that nobodycan log into the MariaDB root user without the proper authorisation.You already have your root account protected, so you can safely answer 'n'.Switch to unix_socket authentication [Y/n]Enabled successfully!Reloading privilege tables.. ... Success!You already have your root account protected, so you can safely answer 'n'.Change the root password? [Y/n]New password:Re-enter new password:Password updated successfully!Reloading privilege tables.. ... Success!By default, a MariaDB installation has an anonymous user, allowing anyoneto log into MariaDB without having to have a user account created forthem. This is intended only for testing, and to make the installationgo a bit smoother. You should remove them before moving into aproduction environment.Remove anonymous users? [Y/n] ... Success!Normally, root should only be allowed to connect from 'localhost'. Thisensures that someone cannot guess at the root password from the network.Disallow root login remotely? [Y/n] ... Success!By default, MariaDB comes with a database named 'test' that anyone canaccess. This is also intended only for testing, and should be removedbefore moving into a production environment.Remove test database and access to it? [Y/n] - Dropping test database... ... Success! - Removing privileges on test database... ... Success!Reloading the privilege tables will ensure that all changes made so farwill take effect immediately.Reload privilege tables now? [Y/n] ... Success!Cleaning up...All done! If you've completed all of the above steps, your MariaDBinstallation should now be secure.Thanks for using MariaDB! |
Go back to the Webmin panel and click the link “Refresh Modules”. Then check the Server / MySQL Database Server.
 Here I can add a new database, add new users, etc.
Install PHP 8.3 which is in the default reposit.
sudo apt install php8.3 php8.3-fpm php8.3-cli php8.3-common php8.3-mbstring php8.3-gd php8.3-intl php8.3-xml php8.3-mysql php8.3-zip php8.3-curl |
Check the version in the terminal window
davidyin@u24:~$ php -vPHP 8.3.6 (cli) (built: Apr 15 2024 19:21:47) (NTS)Copyright (c) The PHP GroupZend Engine v4.3.6, Copyright (c) Zend Technologies with Zend OPcache v8.3.6, Copyright (c), by Zend Technologies |
Check the php8.3-fpm status
sudo service php8.3-fpm status |

Up to now, I can add a new website on the server. I leave it for you.