I have a VM using VirtualBox on Windows 10. The VM was created last year. Now I feel it is too small. I am going to increased the disk without damaging the data on it.
The basic information of the VM.
- It is Ubuntu 16.04 server mode. It means no GUI installed.
- The original disk size is 8GB.
- VDI disk file.
- LVM file system was used when I installed the VM.
- Windows 10 pro (15063.674 build) is the host system.
- VirtualBox 5.1.28 when I do the following.
I am going to increased the disk size from 8Gb to 12GB.
Step 1: Increase the vdi file.
D:\VirtualBox VM>"C:\Program Files\Oracle\VirtualBox\VBoxmanage" modifyhd "ubuntu 16.04.vdi" --resize 12000
0%...10%...20%...30%...40%...50%...60%...70%...80%...90%...100%
Step 2: Use Gparted CD image to modify the size of partition.
- Download the latest verion of Gparted v0.30 iso file.
- Attached the iso file to storage of the VM.
- Start the VM.
- Using default option of Gparted tool.
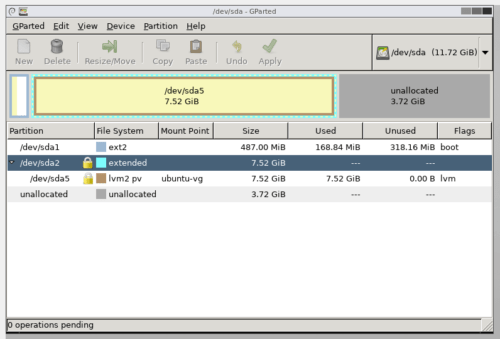
- The following screen shown in the VM terminal window.

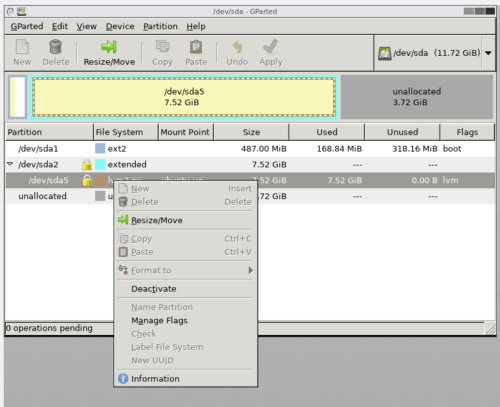
I have to unlock them first. Highlight the sda5, right-click and choose Deactivate.

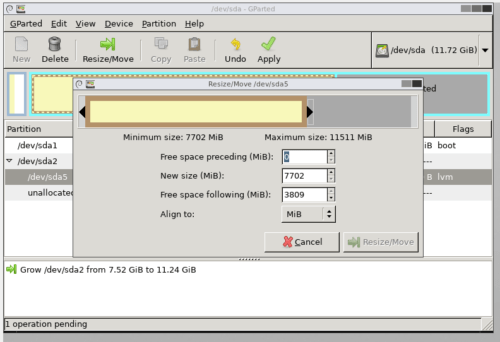
- Resize sda2 to the maximum first, then sda5.
- Apply the changes to the disk or partitions. It may takes a minute or longer.
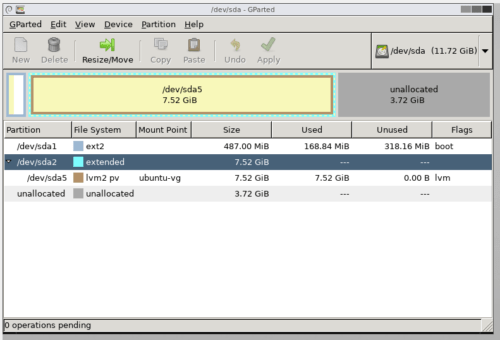
- After the above changes, the partitions are looks like below.
Step 3: Resize the LVM, logical volumes,
- Shutdown the VM
- Remove the Gparted ISO file from the VM in Virtualbox manager
- Start VM
- I use Webmin to manage the size of LVM
- Webmin > Hardware > Logical Volume Management
There are three tabs.
- Volume Groups: ubuntu-vg is 11.24GB already.
- Physical Volumes: sda5 is 11.24GB already.
- LocicalVolumes: root is about 7Gb. It needs to increase.
Click root LV, change Volume size to “Use all free VG space”, Save and restart the VM.
Done.


